Step 1: Install Hugo#
Go to the website https://github.com/gohugoio/hugo/releases and download the corresponding Hugo version.
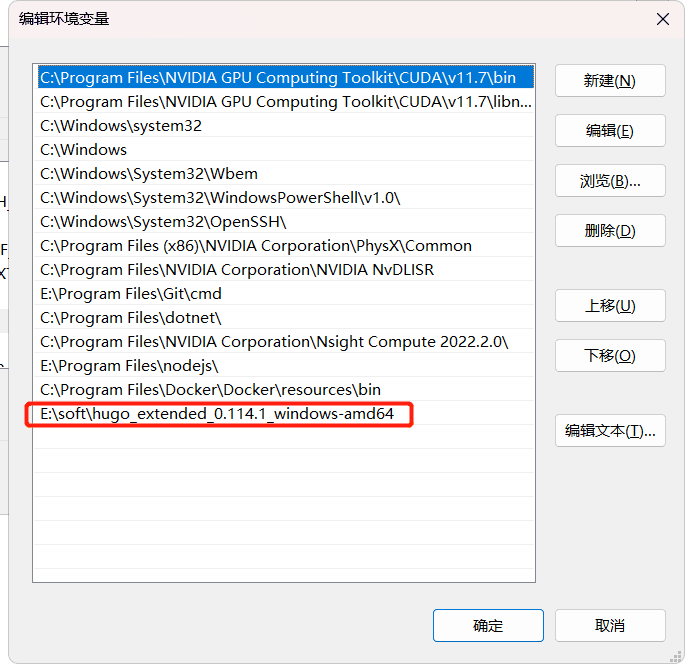
Then, add the path of the downloaded hugo.exe file to the environment variable Path, as shown in the image below:
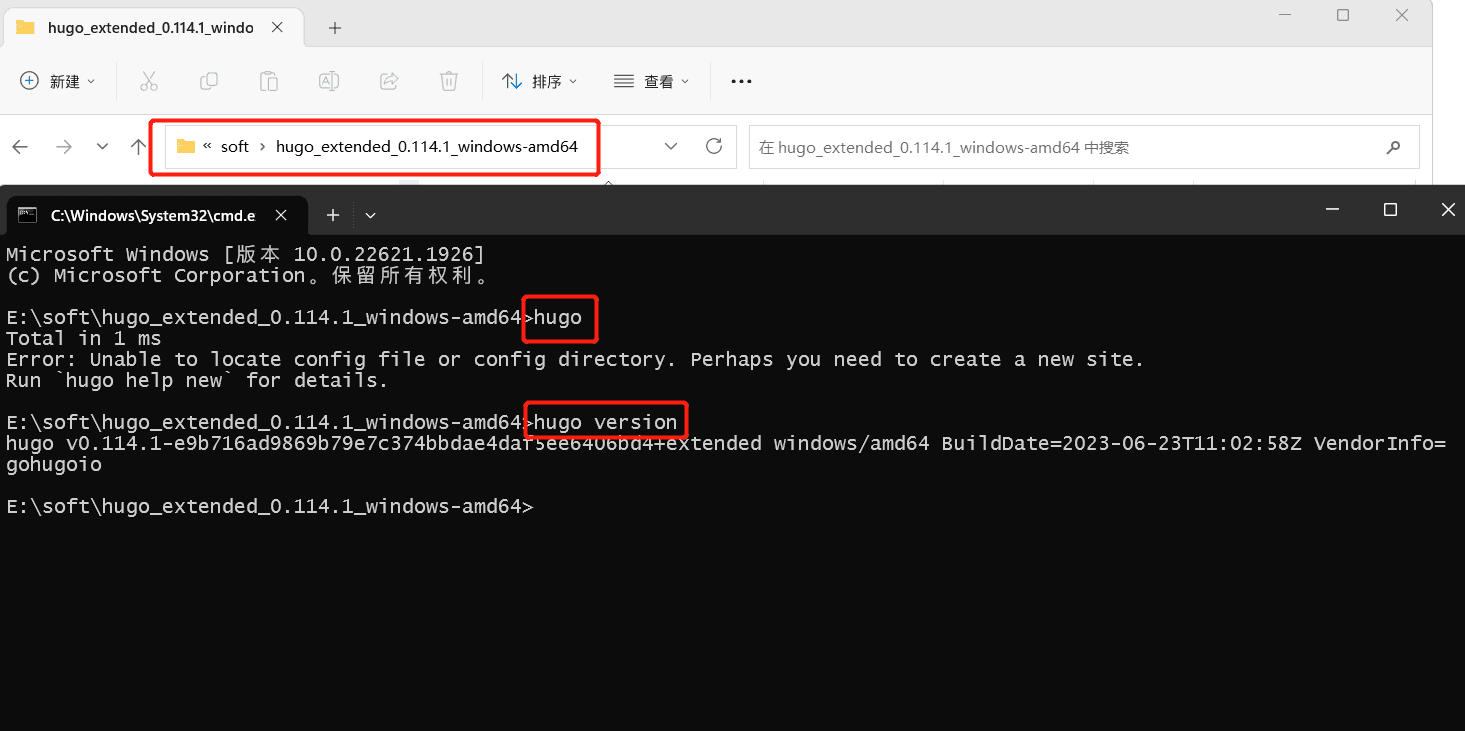
In the directory where hugo.exe is located, open CMD and execute the following command:
hugo
After the execution is complete, check if the installation was successful by running the command:
hugo version
Step 2: Set up the blog locally#
1. Create a site#
In CMD, execute the following command:
hugo new site E:/hugo/blog
This will create a directory named E:/hugo/blog on your local machine.
The directory will contain the following structure:
example/
├── archetypes/
│ └── default.md
├── assets/
├── content/
├── data/
├── layouts/
├── public/
├── static/
├── themes/
└── hugo.toml
The following is a brief overview of each directory, including links to the corresponding sections in the Hugo documentation.
archetypes
You can use this command to create new content files in Hugo. By default, Hugo will create at least a file with the title, date (inferred from the filename), and draft set to true. This can save time and ensure consistency for websites with multiple content types. You can also create your own archetypes with custom pre-configured front matter fields.hugo new``date``title``draft = true
assets
Stores all files that need to be processed by Hugo Pipes. Only files that are used or referenced will be published to the directory..Permalink``.RelPermalink``public
config
Hugo comes with a large number of configuration directives. The configuration directory is the location where these directives are stored as JSON, YAML, or TOML files. Each root setting object can exist as its own file and be structured by environment. Projects with minimal settings and no need for environment awareness can use a single file in their root directory.hugo.toml
Many websites may not need much configuration at all, but Hugo comes with a large number of configuration directives to guide you in how you want Hugo to build your site more precisely. Note: The configuration directory is not created by default.
content
All the content for your website will be located in this directory. Each top-level folder in Hugo is treated as a content section. For example, if your site has three main sections—blog, articles, and tutorials—you would have three directories at /content/blog, /content/articles, and /content/tutorials. Hugo uses sections to assign default content types.blog``articles``tutorials``content/blog``content/articles``content/tutorials
data
This directory is used to store configuration files that Hugo can use during the generation of your site. You can write these files in YAML, JSON, or TOML format. In addition to files added to this folder, you can also create data templates that extract data from dynamic content.
layouts
Stores templates in the form of files that specify how the views of content are rendered into a static website. Templates include list pages, home page, taxonomy templates, partials, single page templates, and more..html
static
Stores all static content: images, CSS, JavaScript, etc. When Hugo builds your site, all assets in the static directory will be copied as-is. A good example of using this folder is when you want to verify site ownership on Google Search Console and you want Hugo to copy the complete HTML file without modifying its content.static
resources
Caches some files to speed up the build process. Template authors can also use it to distribute built Sass files, so you don't need to install a preprocessor. Note: The resources directory is not created by default.
2. Install the Hugo theme#
Clone a theme project to your local machine using git.
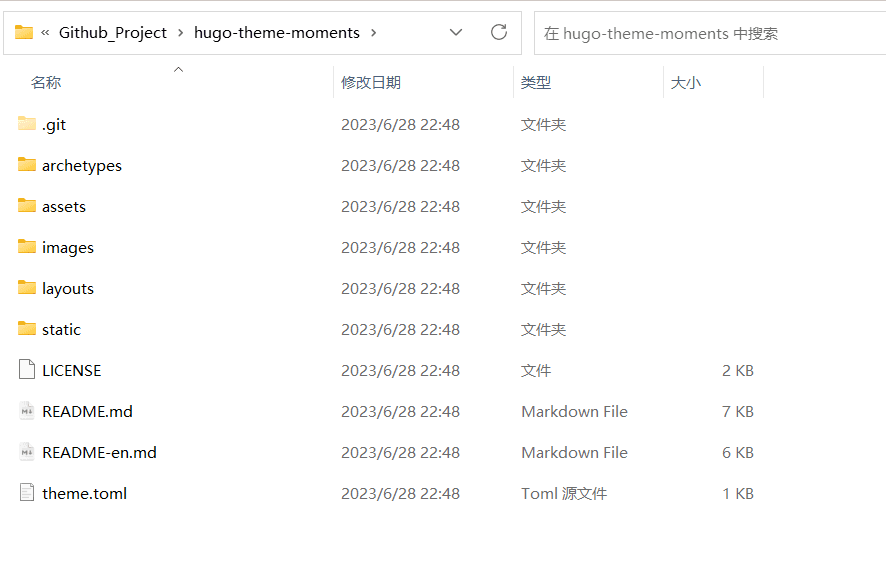
Put the theme in the themes folder.
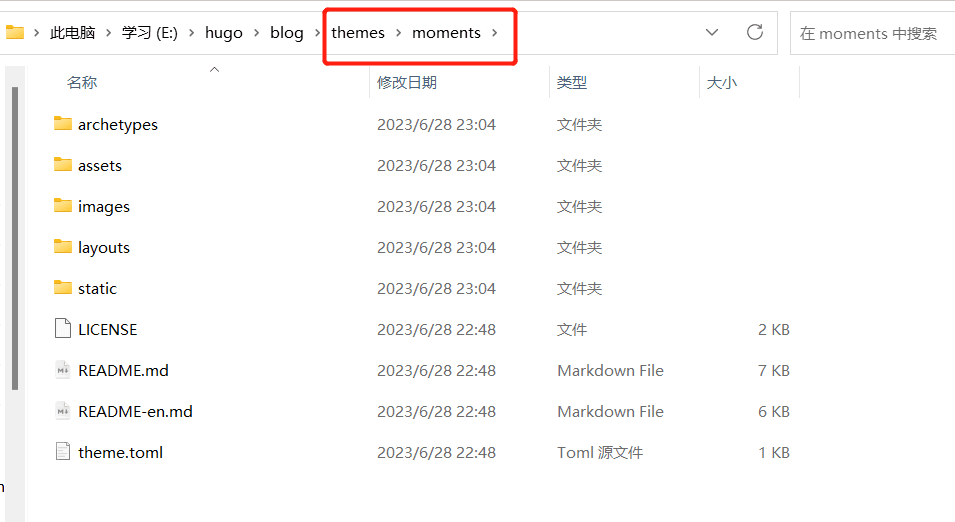
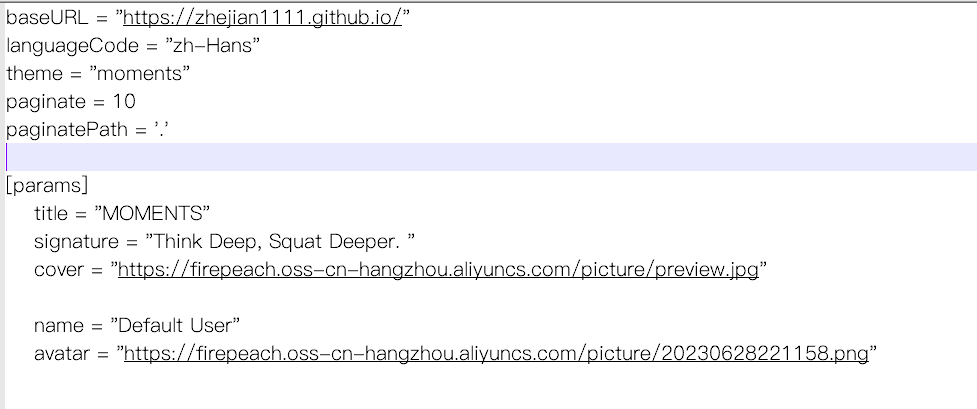
Replace the content of the .toml files in the E:\hugo\blog directory with the content of the theme's .toml files.
3. Create the first file#
In the E:\hugo\blog directory, open CMD and execute the following command:
hugo new moments/firstPost.md
The syntax hugo new is used to create a new file.
The moments is the name of the template file in the archetypes folder of the theme.
The last part is the name of the new file.

Now, the newly created file will appear in the E:\hugo\blog\content directory.

You can now edit this file. For example:
# Top (If you want to pin this Moment, set a value greater than 0. The smaller the value, the higher it will be pinned. For example, 1 will pin the moment to the top.)
top:

name: Fire Peach
avatar: https://firepeach.oss-cn-hangzhou.aliyuncs.com/picture/20230628221158.png

# Publication date
date: 2023-06-29T00:03:27+08:00

# Add tags to the Moment
tags:
 -
 -

# Additional information (optional, fill in one item or leave it blank)
# Additional information type 1: Single image
pictures:
 -

# Additional information type 2: Web link
# link: Required, the web link;
# link_text: Required, the text to display for the link;
# link_logo: Optional, the logo of the website. Some websites can automatically find the corresponding icon, so you don't need to add the logo manually.
link:
link_text:
link_logo:

# Note
note:

This is a new moment.
4. Run a local test#
In CMD, execute the following command:
hugo server --theme=moments --buildDrafts
The server command is used to start the local server.
The value of --theme should match the name of the theme in the themes folder, indicating the theme to be used.
The --buildDrafts flag is used to display the content, including the content with the draft status.
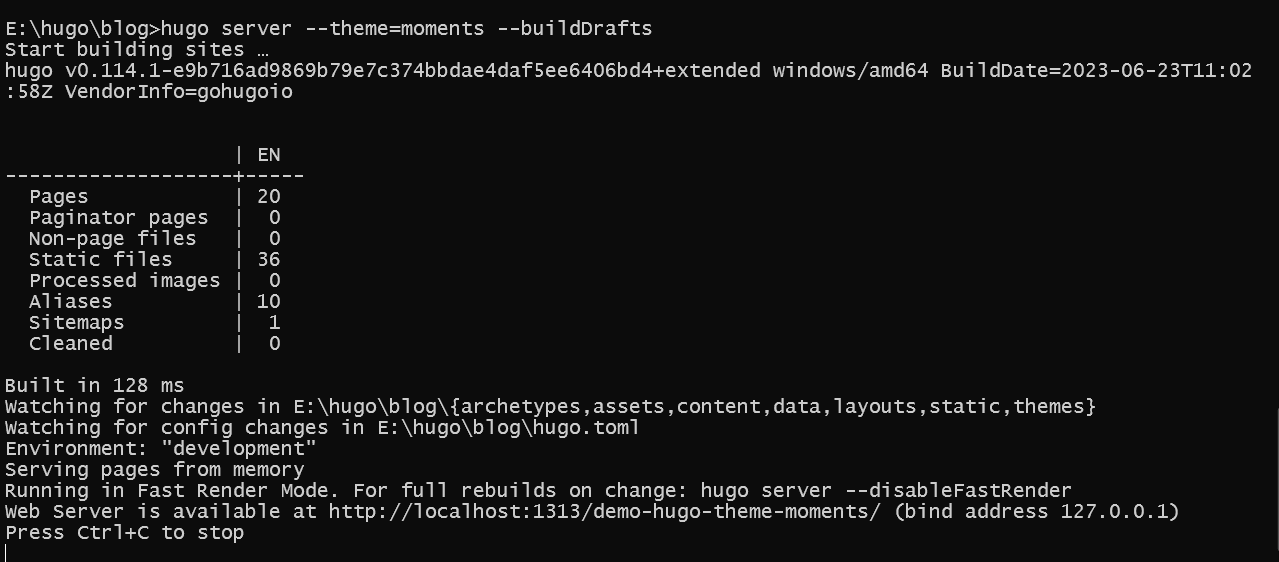
Now, open the website http://localhost:1313/
It should be running successfully.

Step 3: Deploy the blog#
1. Create a new project on GitHub#
Refer to another blog post for instructions on how to create a new project on GitHub.
2. Build the blog#
In the E:\hugo\blog directory, execute the following command in CMD:
hugo --theme=moments --baseURL='zhejian1111.github.io'
--theme is the name of the theme.
--baseURL is the domain name on GitHub.
This will create a new public folder.
Push the contents of this folder to GitHub.
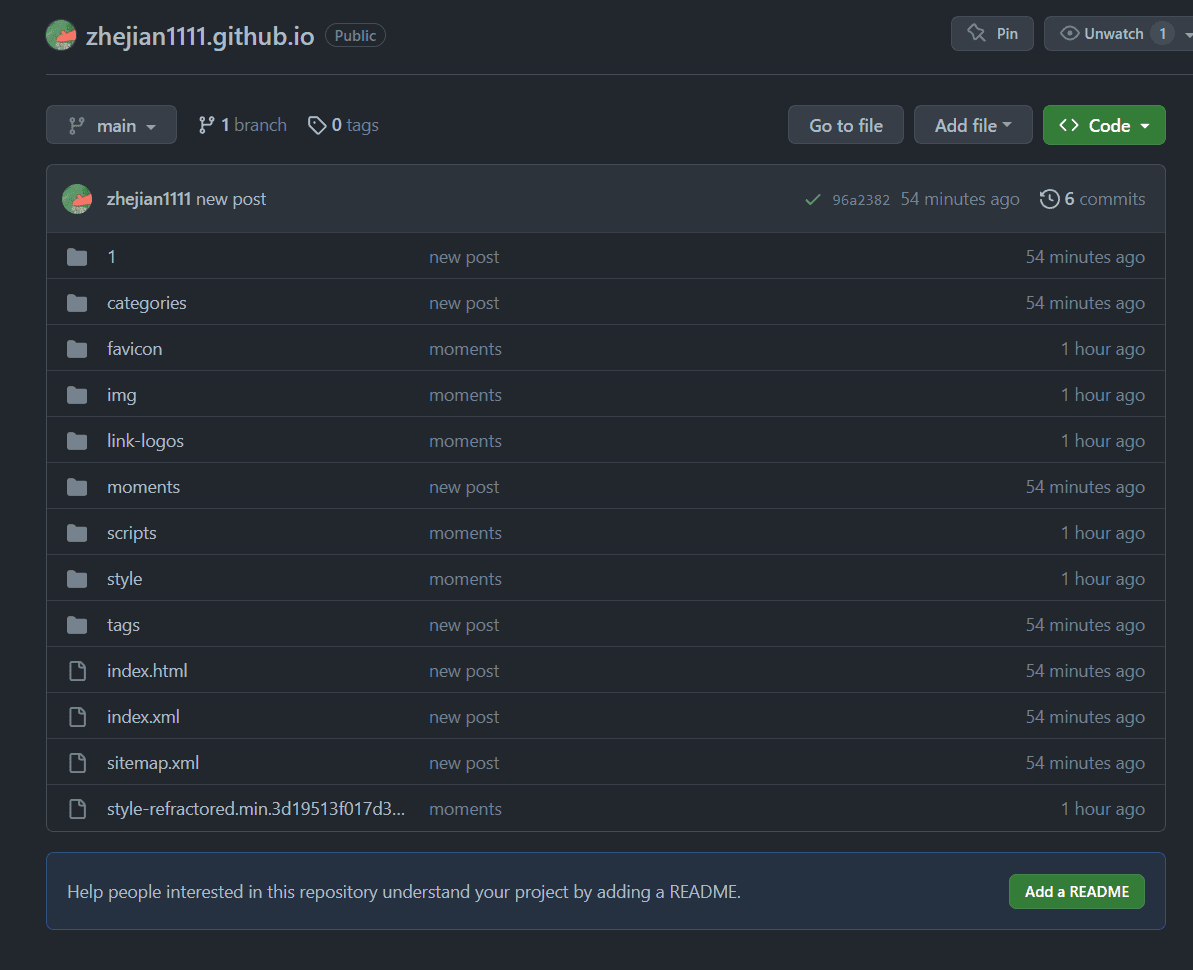
After a short wait, you should be able to access the website using the corresponding domain name on GitHub.
