## Generating CSR and Key for SSL Certificate on VPS#
When we want to apply for an SSL certificate for a website, we need to prepare a CSR (Certificate Signing Request) file, which includes the necessary information for the certificate application. The most important information is the domain name, which must be the domain name you want to access via HTTPS. For example, if I want to generate a certificate for yus.bio, I need to execute the following command:
openssl req -new -newkey rsa:2048 -nodes -keyout yus.key -out yus.csr
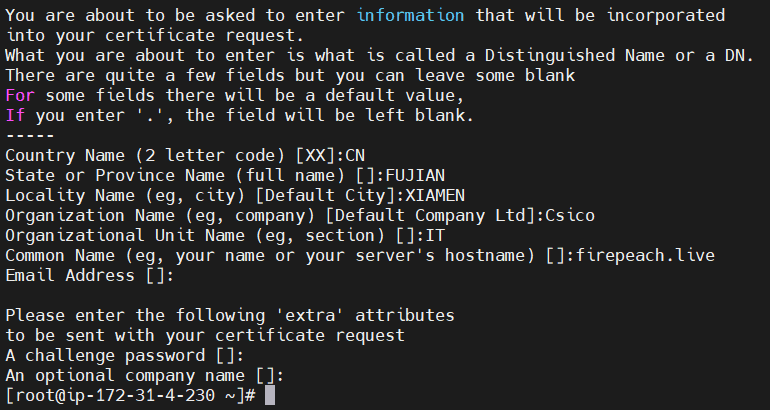
This command will generate two files. yus.key is the key file, which should be carefully saved as it will be used during the installation of the SSL certificate. You need to enter the required information, such as the domain name, according to the prompts. Follow the prompts step by step to generate these two files.
Country Name (2 letter code) [AU]: CN
State or Province Name (full name) [Some-State]: Fujian
Locality Name (eg, city) []: Xiamen
Organization Name (eg, company) [Internet Widgits Pty Ltd]: Cisco
Organizational Unit Name (eg, section) []: IT
Common Name (eg, YOUR name) []: yus.bio
Email Address []: (press Enter)
Please enter the following 'extra' attributes to be sent with your certificate request

A challenge password []: (press Enter)
An optional company name []: (press Enter)
You can leave the Email Address and A challenge password blank and press Enter. If you are unsure about how to fill in the required information, you can refer to the above example, except for the domain name.

After that, execute the command:
cat yus.csr
to get the content of the CSR.
The other .key file must not be lost, as it will be needed during the installation.
## Applying for SSL Certificate#
If the domain name is registered on name.com, you can directly activate it.
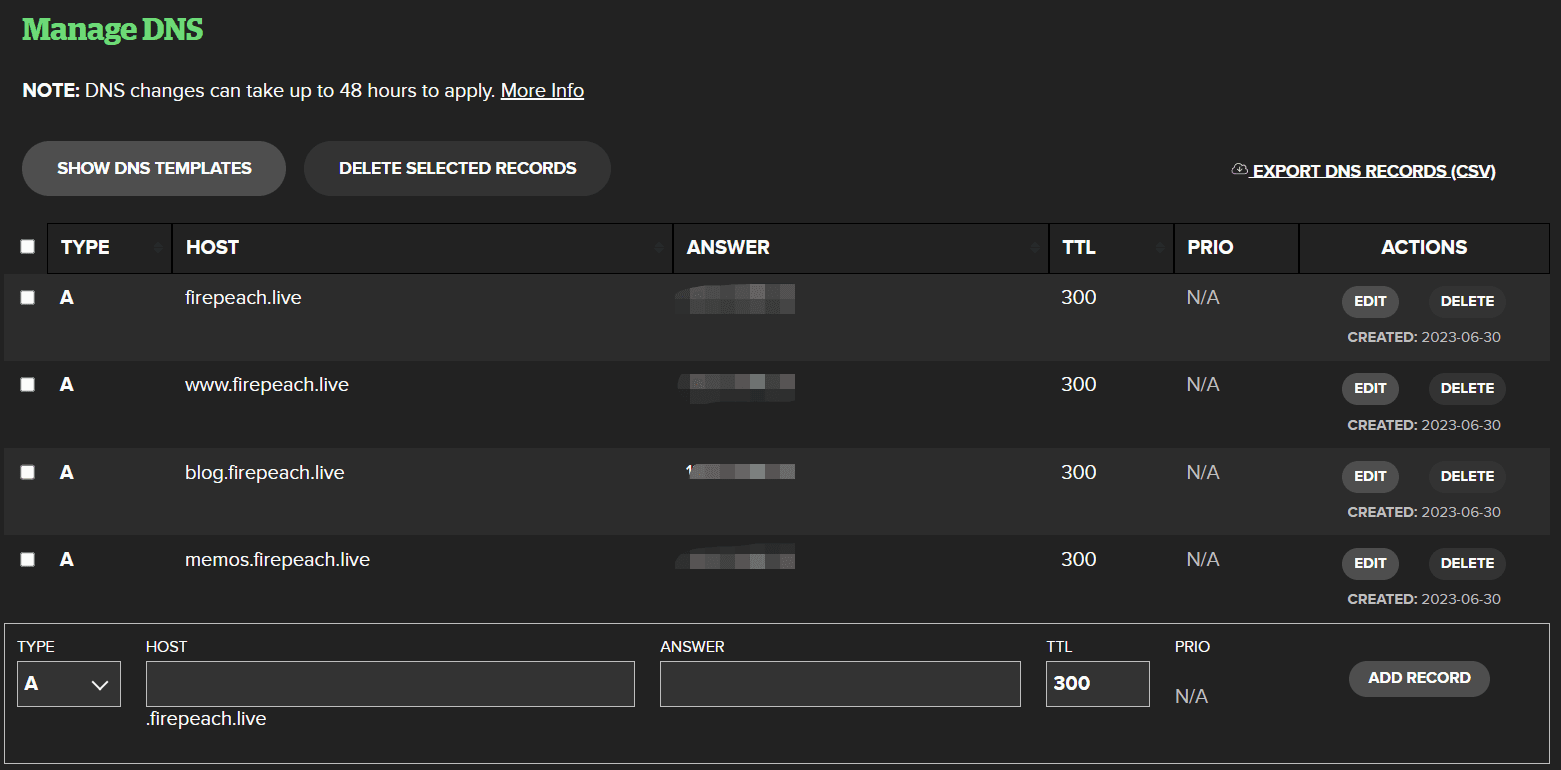
First, add a DNS A record.

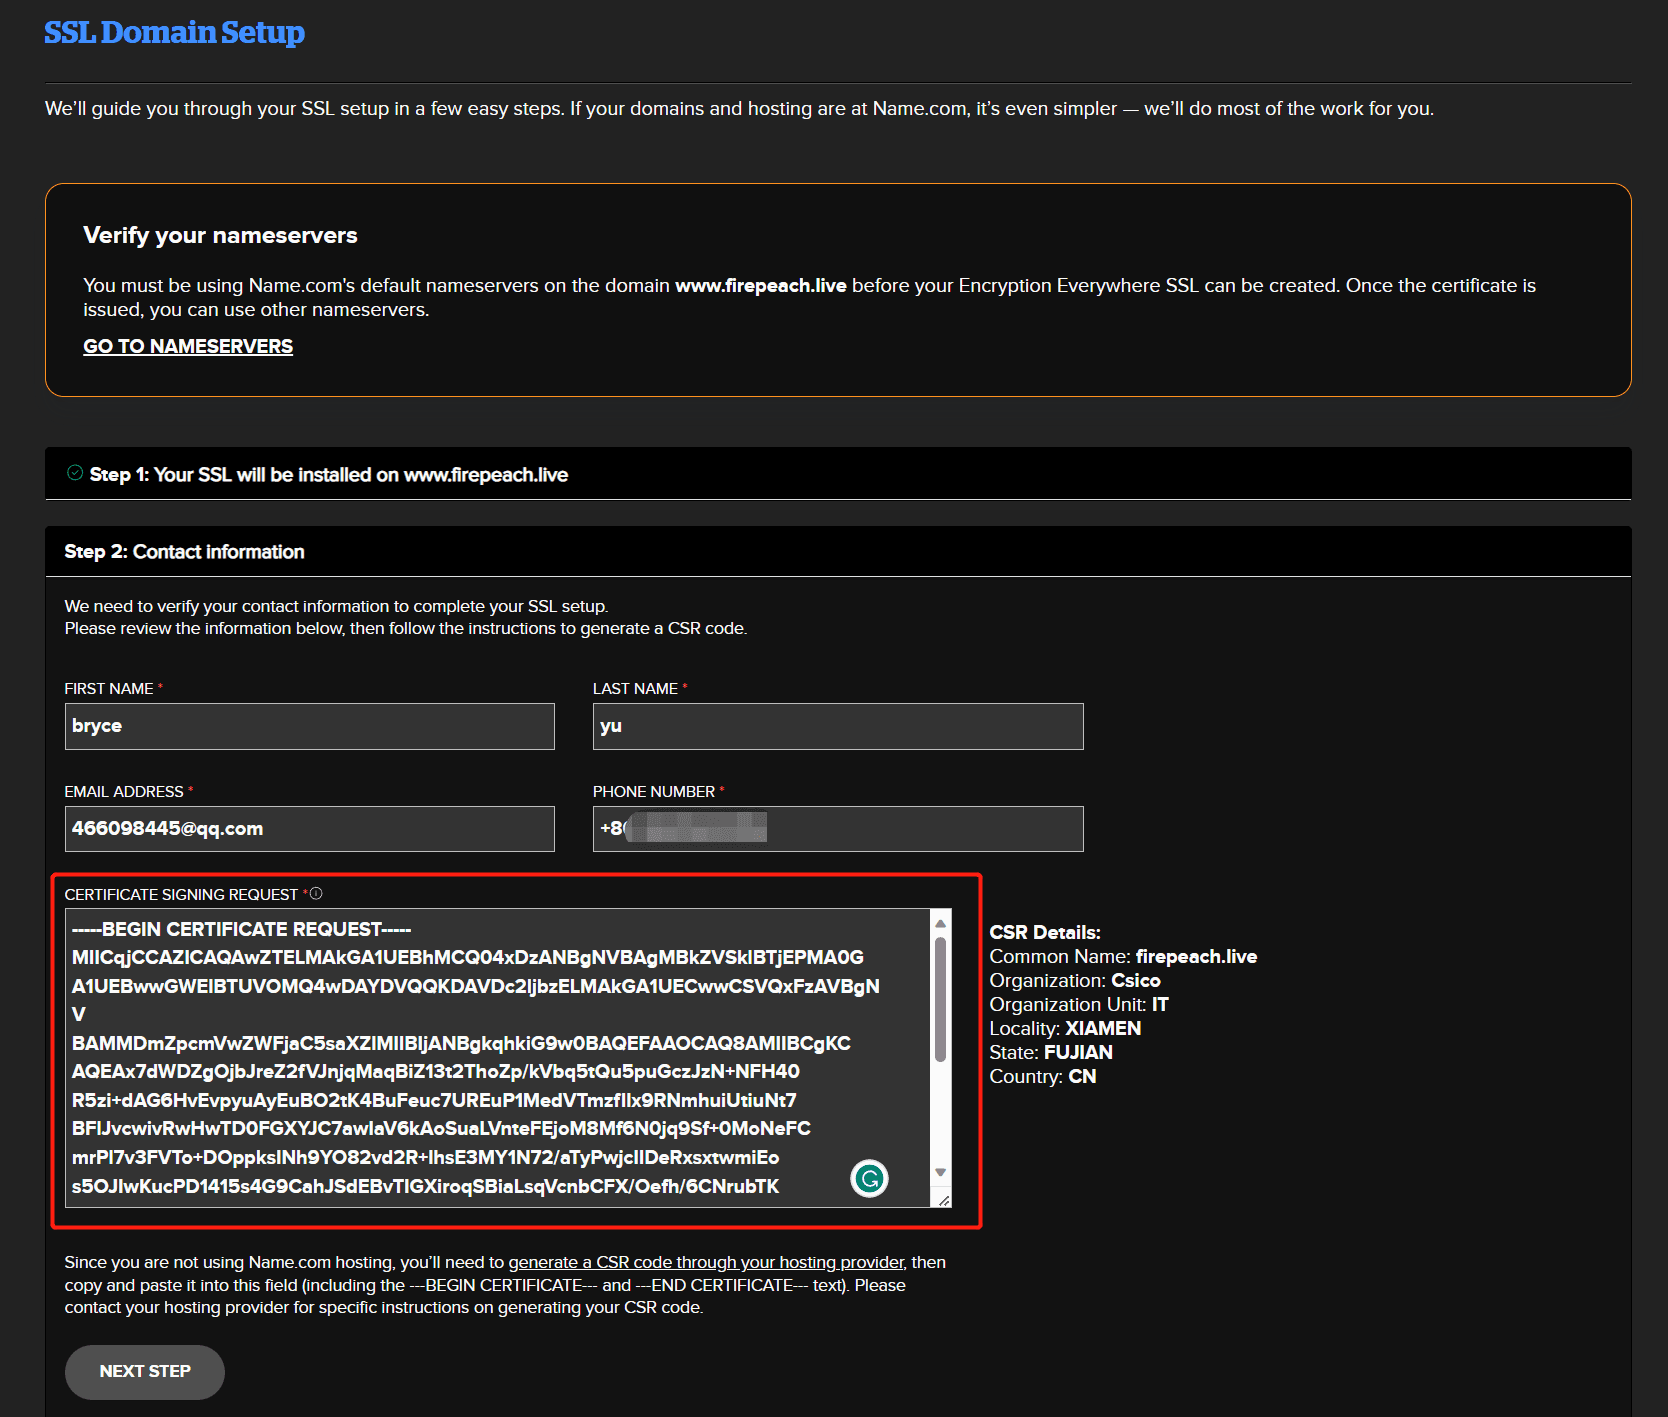
Then, in the SSL application interface,

copy the entire content of yus.csr obtained in the previous step to the "Certificate Signing Request" field in the SSL application interface. Click Next.
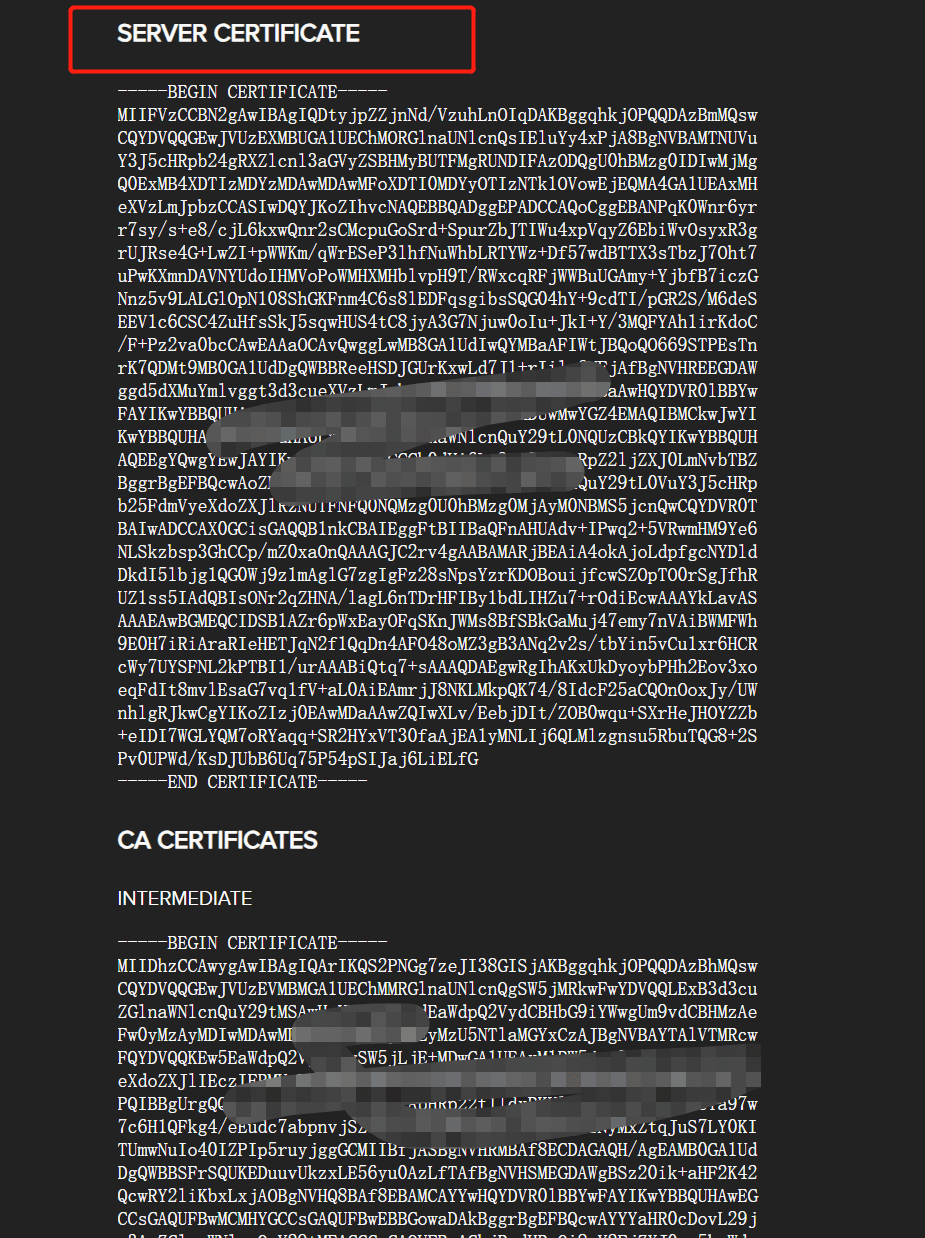
You will obtain the following certificate:

The SERVER CERTIFICATE is the PEM certificate, which needs to be added to the VPS server.
vi yus.pem
Copy the content of SERVER CERTIFICATE, CA CERTIFICATE, and ROOT into the file.
Finally, place yus.pem and yus.key in the /home/cert directory.
## Installing the Certificate on VPS using Nginx#
### Installing Nginx#
Check the status of Nginx:
sudo systemctl status nginx
Install Nginx using apt:
sudo apt-get install nginx -y
Start Nginx. The default installation directory is /etc/nginx.
/etc/init.d/nginx start
Test if the Nginx configuration is correct. This command is often used when modifying the configuration in the future.
nginx -t

Check the Nginx version:
nginx -v
Start, stop, or restart Nginx:
service nginx start / stop / restart
## Modifying the Configuration File#
For example, if you want to map the Halo application deployed on port 8090 to port 443 for HTTPS:
- First, go to the conf.d directory and add the halo.conf file. The content is as follows:
upstream halo {
  server 127.0.0.1:8090;
}
- Then, go to the sites-enabled directory.
Delete the default file.
Add the halo file:
vi halo
The content is as follows:
server {
		# Listen on port 443 for HTTPS
		# Listen on port 80 for HTTP
        listen 443 ssl http2;
        listen [::]:443 ssl http2;

        # The domain name to be mapped
		server_name www.yus.bio;

		# Path to the pem certificate
        ssl_certificate "/home/cert/yus.pem";

        # Path to the generated key
        ssl_certificate_key "/home/cert/yus.key";

        ssl_session_cache shared:SSL:1m;
        ssl_session_timeout  5m;
        ssl_ciphers ECDHE-RSA-AES128-GCM-SHA256:ECDHE:ECDH:AES:HIGH:!NULL:!aNULL:!MD5:!ADH:!RC4;
        ssl_prefer_server_ciphers on;


        client_max_body_size 1024m;
        location / {
		        # The .conf file created in the conf.d directory
                proxy_pass http://halo;
                proxy_set_header HOST $host;
                proxy_set_header X-Forwarded-Proto $scheme;
                proxy_set_header X-Real-IP $remote_addr;
                proxy_set_header X-Forwarded-For $proxy_add_x_forwarded_for;
                # First attempt to serve request as file, then
                # as directory, then fall back to displaying a 404.

        }

}
After saving, execute:
nginx -t
to check for any configuration errors.
### Starting Nginx#
Finally, execute:
service nginx restart
Now you can access the website successfully using the domain name.