## 在 VPS 中生成 csr 和 key 以用于 ssl 证書#
當我們要為網站申請 ssl 證書的時候需要準備 csr (證書請求文件), 包含申請證書所需要的相關信息,其中最重要的是域名,填寫的域名必須是你要以 https 方式訪問的那個域名。
比如我要生成 yus.bio 的證書
需要執行
openssl req -new -newkey rsa:2048 -nodes -keyout yus.key -out yus.csr
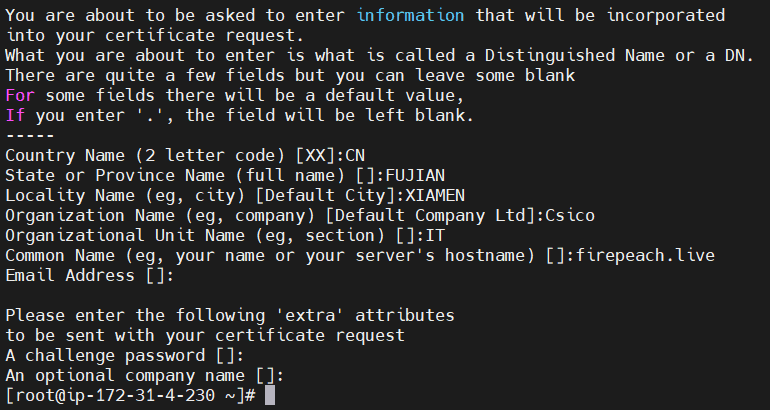
此命令將會生成兩個文件,cmsky.key 是密鑰文件,小心保存好這個文件,安裝 SSL 證書的時候要用到。需要根據提示輸入相應的信息,如域名等,按照提示一步一步操作,最後生成這兩個文件。
Country Name (2 letter code) [AU]: CN (國家代碼)
State or Province Name (full name) [Some-State]: Fujian (省)
Locality Name (eg, city) []: Xiamen (城市)
Organizat[iON](http://www.idcbaby.com/tag/418)  Name (eg, company) [Internet Widgits Pty Ltd]: Cisco (企業/組織)
Organizational Unit Name (eg, section) []: IT (部門)
Common Name (eg, YOUR name) []: yus.bio (域名/請正確填寫)
Email Address []: (可直接回車)
Please enter the following ‘extra’ attributes to be sent with your certificate request

A challenge password []: (直接回車)
An optional company name []: (直接回車)
其中的 Email Address 和 A challenge password 可以留空,不必填寫,直接回車。以上需要填寫的內容,如果不清楚應該怎麼填寫,除了域名其它的可以按照上面的內容填寫。

之後執行命令
cat yus.csr
就會得到 csr 的內容
另外一個 .key 文件,一定不能搞丟 ,安裝的的時候需要用到
## 申請 ssl,獲得證書#
如果是在 name.com 註冊的域名,可以直接激活
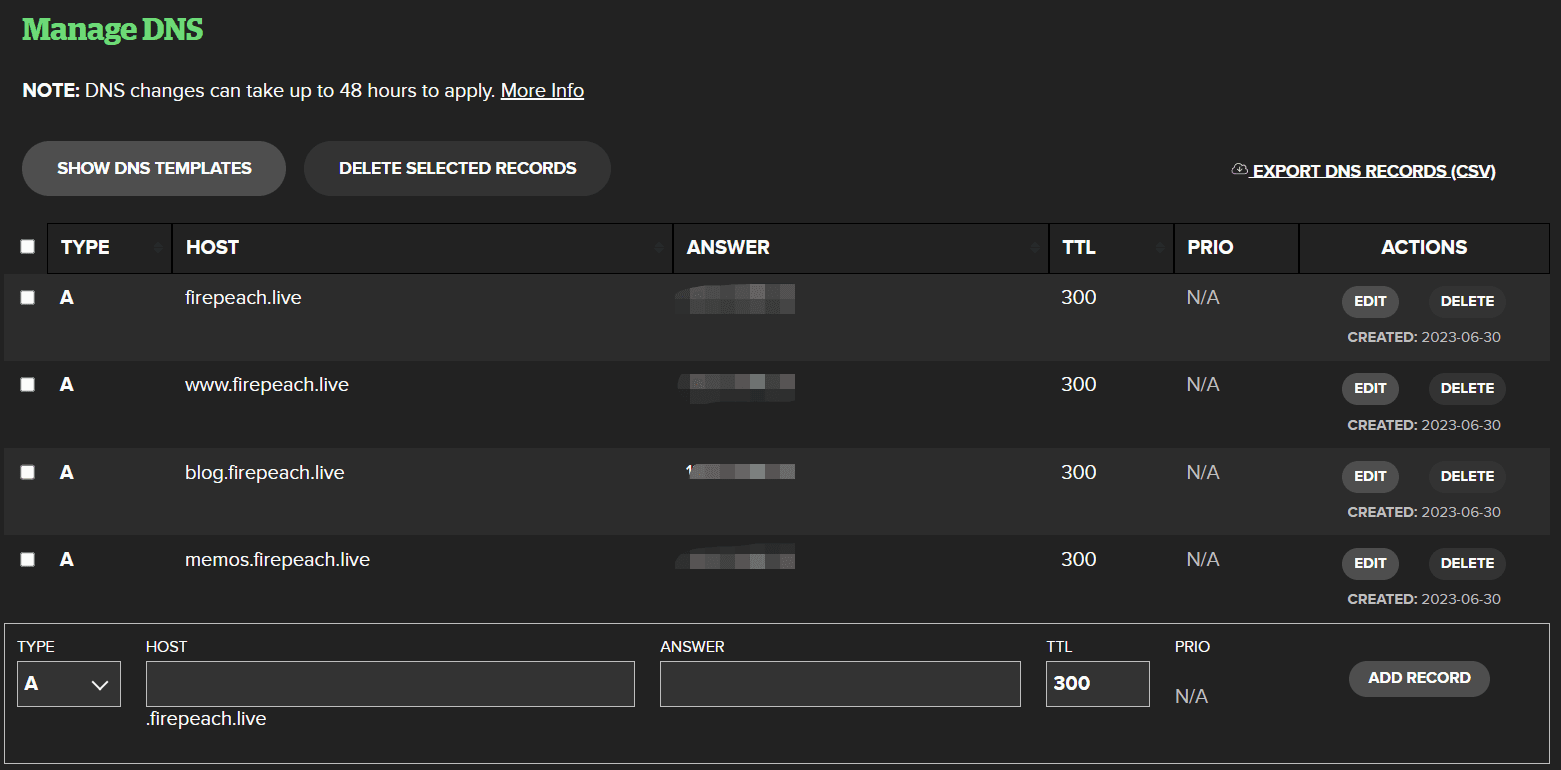
首先得添加 dns 的 A 記錄

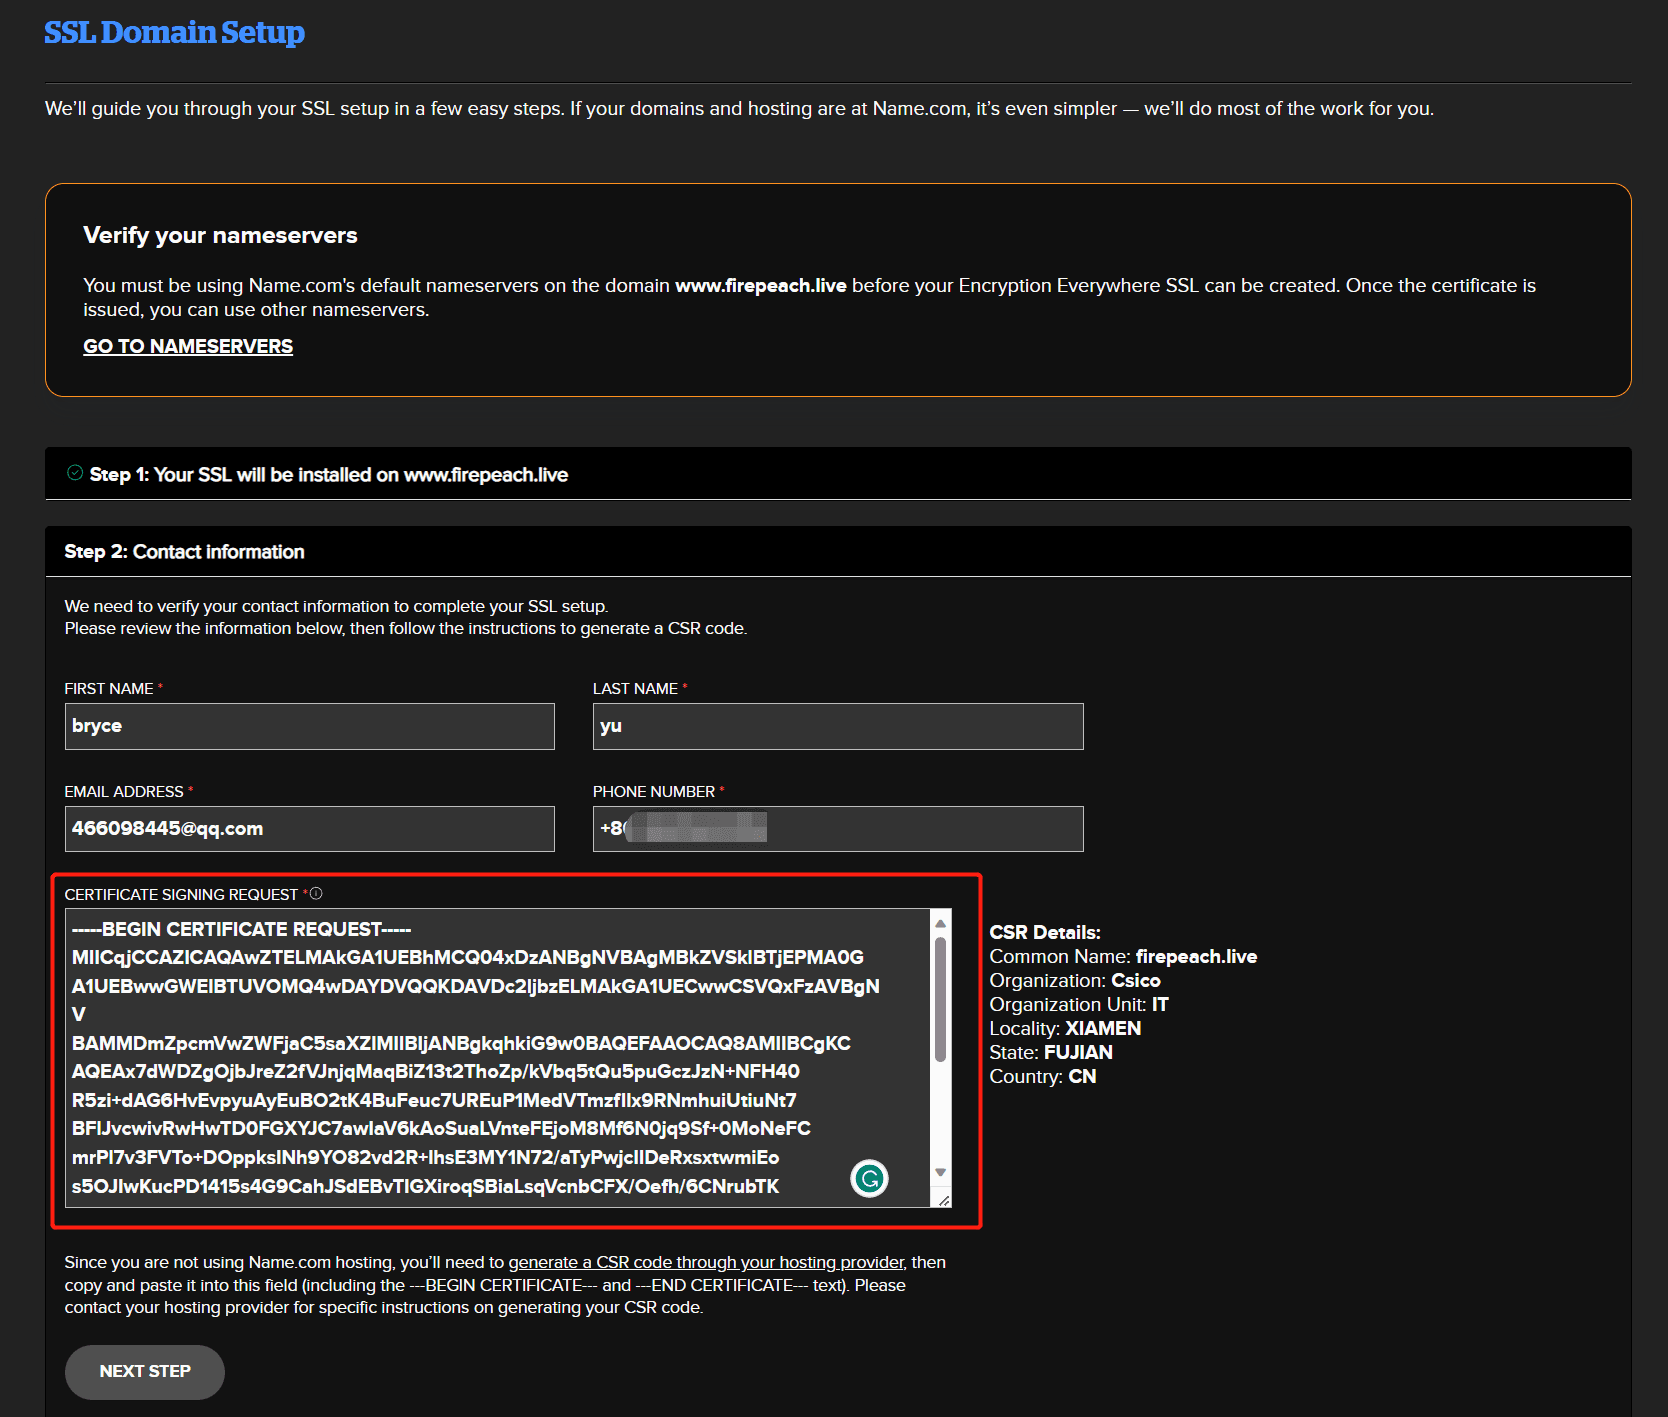
接著在 ssl 的申請界面中

將上一步獲取的 yus.csr 的內容 全部 複製到 ssl 申請界面中的 證書簽名請求
點擊下一步
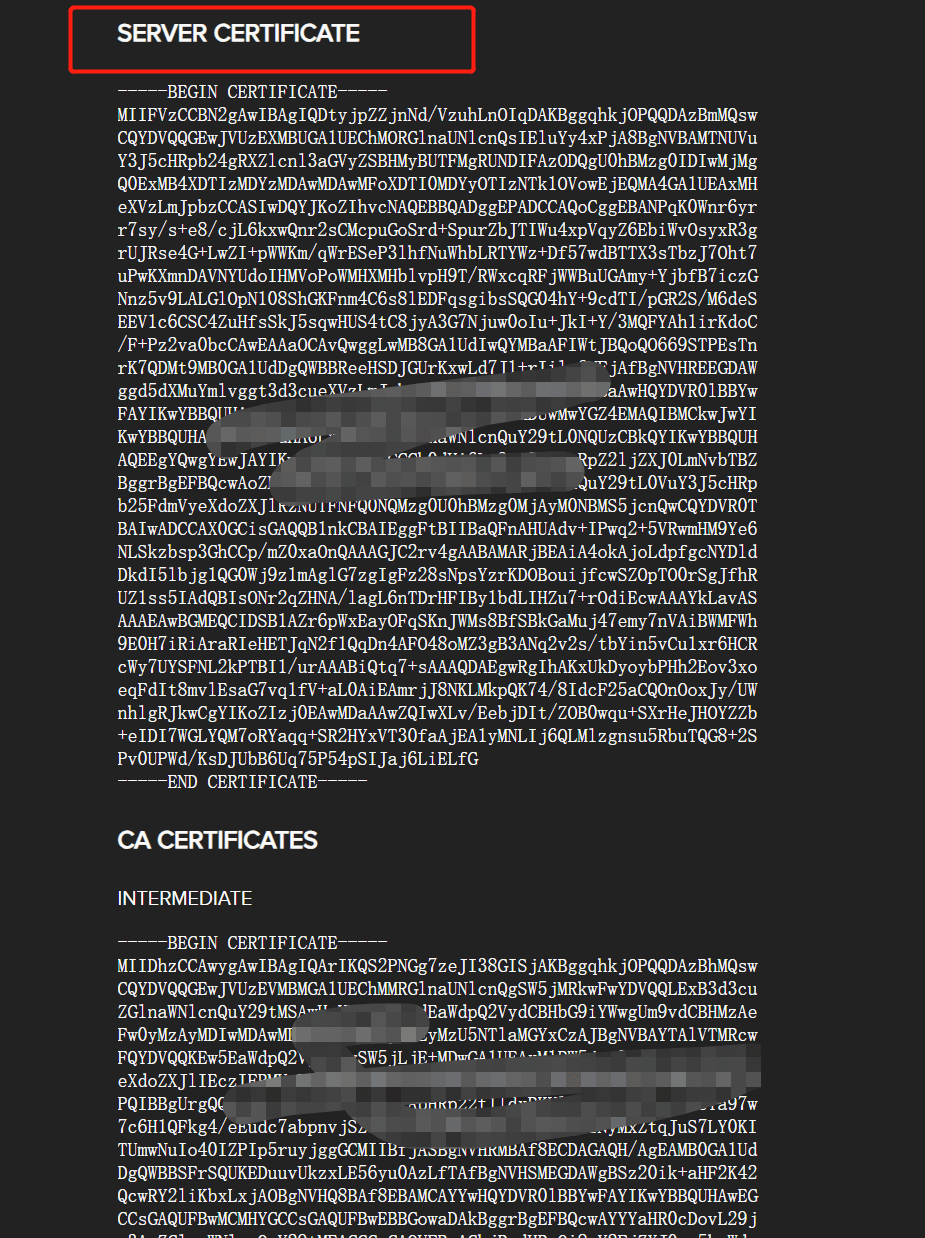
就會得到以下證書

其中這個 SERVER CERTIFICATE 就是 pem 證書,將要添加到 VPS 伺服器中
vi yus.pem
將 SERVER CERTIFICATE 、CA CERTIFICATE 、ROOT 中的內容複製進去
最後將 yus.pem 和 yus.key 放到 /home/cert 目錄下
## VPS 中通過 nginx 安裝證書#
### 安裝 Nginx#
查看狀態
sudo systemctl status nginx
通過 apt 安裝
sudo apt-get install nginx -y
啟動
默認安裝目錄為 /etc/nginx
/etc/init.d/nginx start
測試 Nginx 配置是否正確,以後修改配置也常常用到
nginx -t

查看 nginx 版本
nginx -v
Nginx 啟動、停止、重啟
service nginx start / stop / restart
## 修改配置文件#
例如現在需要把部署在 8090 端口的 halo 應用映射到 https 的 443 端口
- 首先進入 conf.d 目錄,添加 halo.conf 文件
內容如下
upstream halo {
  server 127.0.0.1:8090;
}
- 接著進入到 sites-enabled 目錄
刪除默認的 default 文件
添加 halo 文件
vi halo
內容如下
server {
		# https 監聽的端口為 443
		# http 監聽的端口為 80
        listen 443 ssl http2;
        listen [::]:443 ssl http2;

        # 需要映射到的域名
		server_name www.yus.bio;

		# pem 證書的路徑
        ssl_certificate "/home/cert/yus.pem";

        # 生成的 key 的路徑
        ssl_certificate_key "/home/cert/yus.key";

        ssl_session_cache shared:SSL:1m;
        ssl_session_timeout  5m;
        ssl_ciphers ECDHE-RSA-AES128-GCM-SHA256:ECDHE:ECDH:AES:HIGH:!NULL:!aNULL:!MD5:!ADH:!RC4;
        ssl_prefer_server_ciphers on;


        client_max_body_size 1024m;
        location / {
		        # conf.d 目錄中創建的 .conf 文件名
                proxy_pass http://halo;
                proxy_set_header HOST $host;
                proxy_set_header X-Forwarded-Proto $scheme;
                proxy_set_header X-Real-IP $remote_addr;
                proxy_set_header X-Forwarded-For $proxy_add_x_forwarded_for;
                # First attempt to serve request as file, then
                # as directory, then fall back to displaying a 404.

        }

}
保存後執行
nginx -t
檢查是否有配置錯誤
### 啟動 nginx#
最後執行
service nginx restart
成功通過域名訪問